ChemCAD
The following steps will guide you through the installation process:
1. ChemCAD can be downloaded using this link: http://download.eng.ua.edu/chemcad715.msi
2. Once the installation file downloads, navigate to your downloads folder. Find the installation file you just downloaded and double-click it to run the setup.
3. A window may appear asking if you want to allow the application to make changes to your computer. Select "yes". If it doesn't show up now, it may later on during the installation.
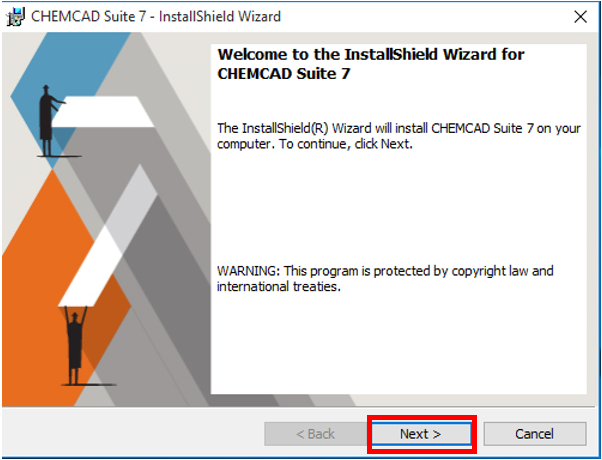
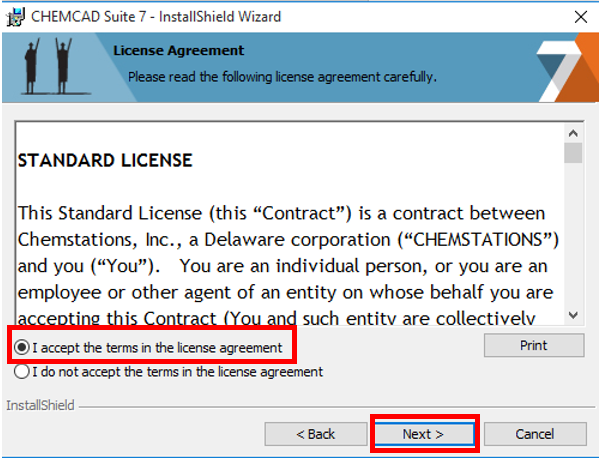
4. The installation wizard will appear. Click "next" and accept the terms of the license agreement. Then click "next".
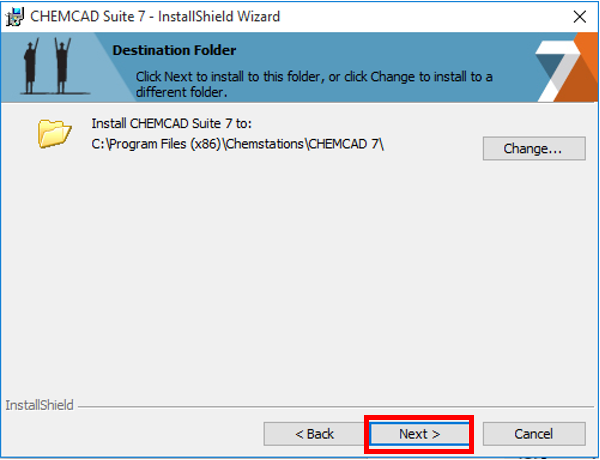
5. The next part allows you to select a destination folder for the installation. Just keep the default folder and click "next".
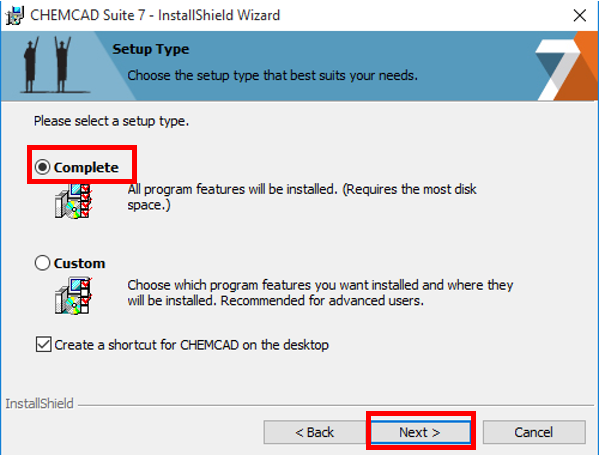
6. The next part asks you to select a setup type. Make sure "complete" is selected. Also, make sure the box is checked beside "create a shortcut for CHEMCAD on the desktop".
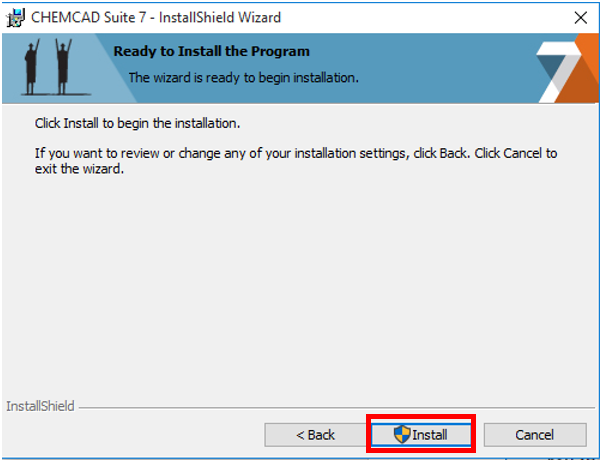
7. On the next page, click "install". Once it installs, another window will appear confirming the the installation is complete. Click "finish".
8. Now you will need to run ChemCAD to set up the license. You can find the ChemCAD shortcut on your desktop.
9. A window will appear with the license agreement. Click "yes".
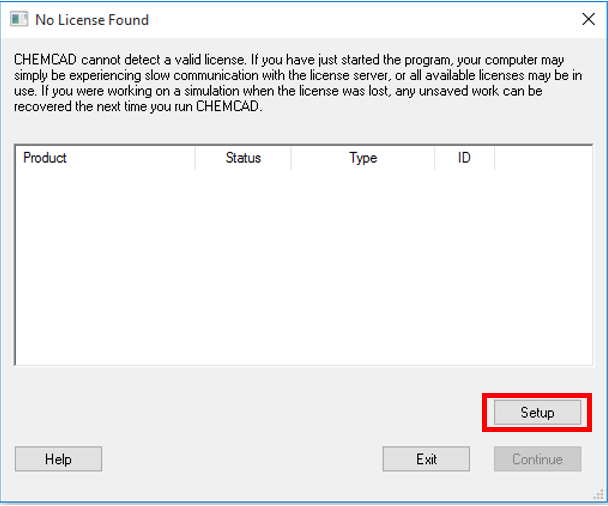
10. A window should now appear stating no license was found. Click "setup in the window.
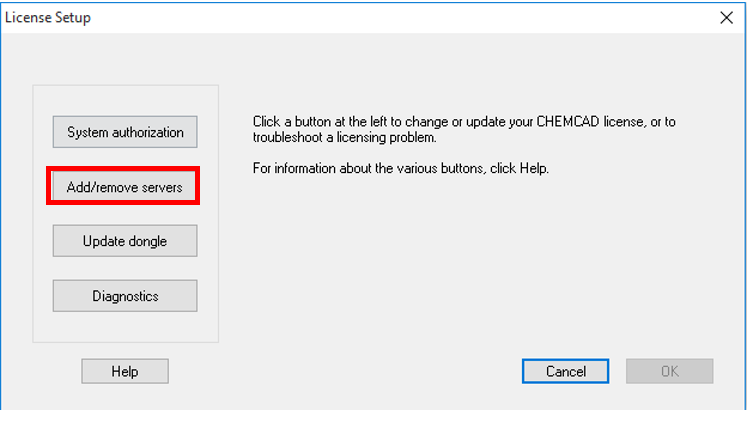
11. In the window that appears, click "add/remove servers".
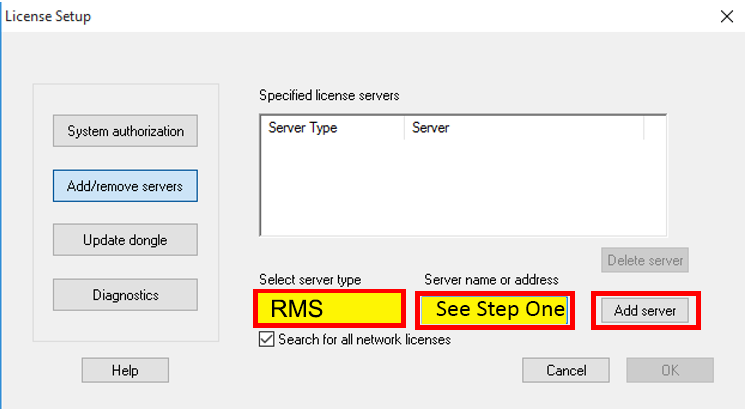
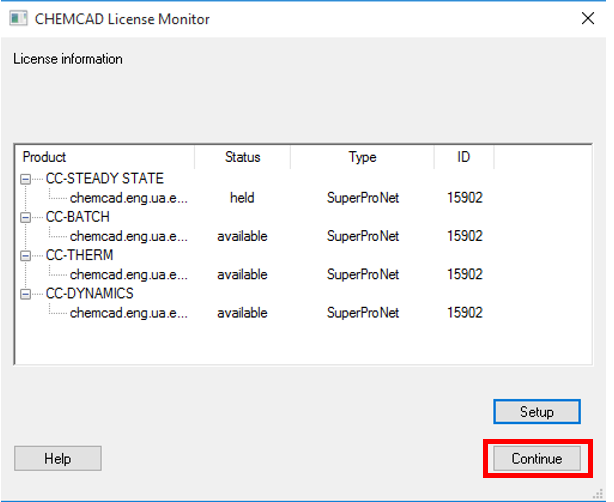
12. You should now be able to select the server type and enter a server address. Select "SuperProNet" from the server type drop-down. Enter "chemcad.eng.ua.edu" into the server address box. Then click "add server", then "ok". After this, the window should confirm the license was picked up. Click "continue", and ChemCAD is now ready for use.

