ChemCAD
ChemCAD is a suite of chemical process simulation software. It allows users to simulate processes in chemical, petro-chemical, pharmaceutical,thermodynamic models and contains a database of thousands of components for gases, liquids, solids, and electrolytes.
Used in: CHE 255, CHE 305, CHE 321, CHE 322, CHE 323, CHE 324, CHE 354, CHE 481, CHE 482, CHE 492, CHE 493, CHE 592
ChemCAD is available to all faculty, staff, and students.
Contents
Supported Operating Systems
 ChemCAD is only available for Windows. Mac and Linux users will need to install Windows first. Mac users can get more information about installing Windows here: How to Install Windows on a Mac
VPN requirement
 Connection to campus VPN is not required to license ChemCAD.
Download ChemCAD
ChemCAD version 8.0.2.15400 can be downloaded from this link to UA BOX
The license information can be downloaded from this link to UA BOX
The ChemCAD 8 user guide is also available via this link to UA BOX
Video: How to install ChemCAD
How to install ChemCAD step-by-step
1. Download ChemCAD from the Box link above and note the license server name. You will need it later.
2. Run the downloaded file.
3. A window may appear asking if you want to allow the application to make changes to your computer. Select "yes". If it doesn't show up now, it may later on during the installation.
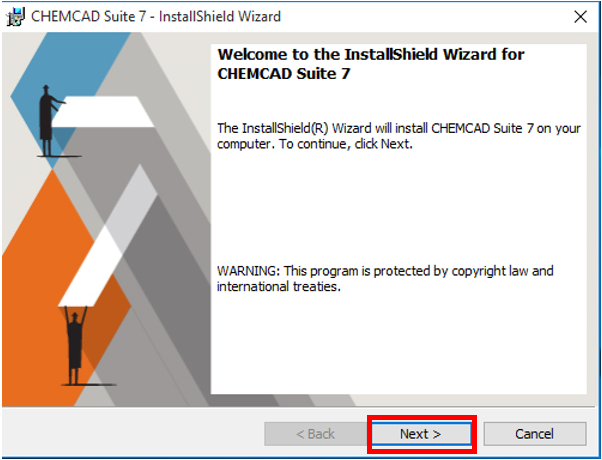
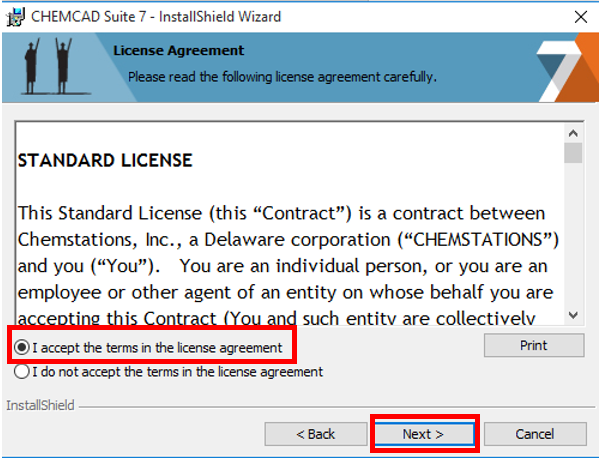
4. The installation wizard will appear. Click "next" and accept the terms of the license agreement. Then click "next".
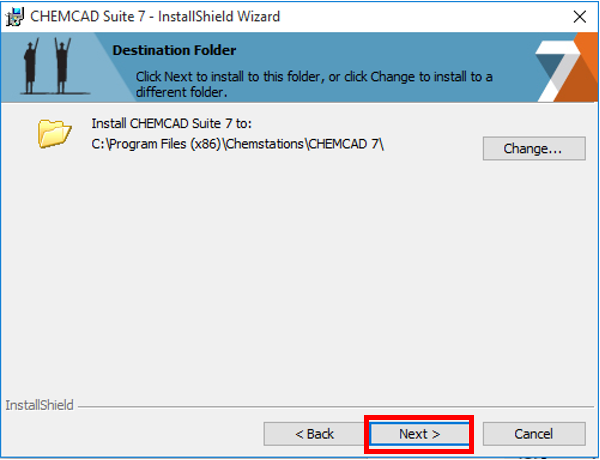
5. The next part allows you to select a destination folder for the installation. Just keep the default folder and click "next".
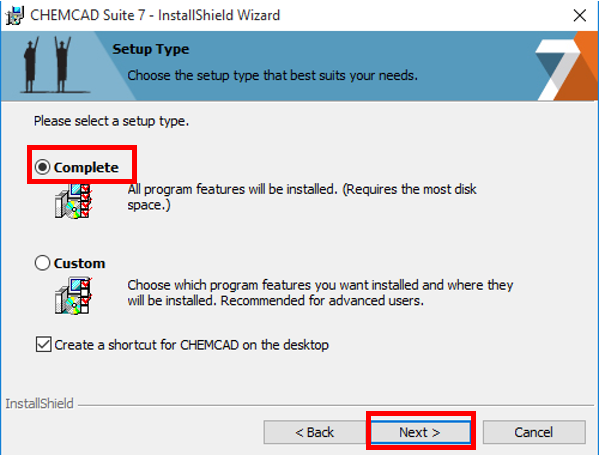
6. The next part asks you to select a setup type. Make sure "complete" is selected. Also, make sure the box is checked beside "create a shortcut for CHEMCAD on the desktop".
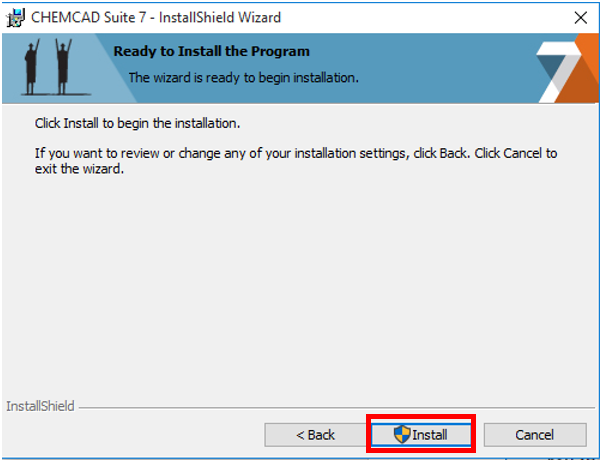
7. On the next page, click "install". Once it installs, another window will appear confirming the the installation is complete. Click "finish".
8. Now you will need to run ChemCAD to set up the license. You can find the ChemCAD shortcut on your desktop.
9. A window will appear with the license agreement. Click "yes".
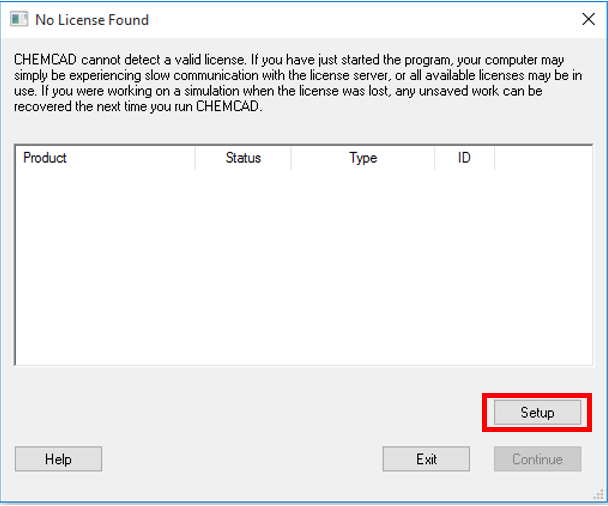
10. A window should now appear stating no license was found. Click "setup in the window.
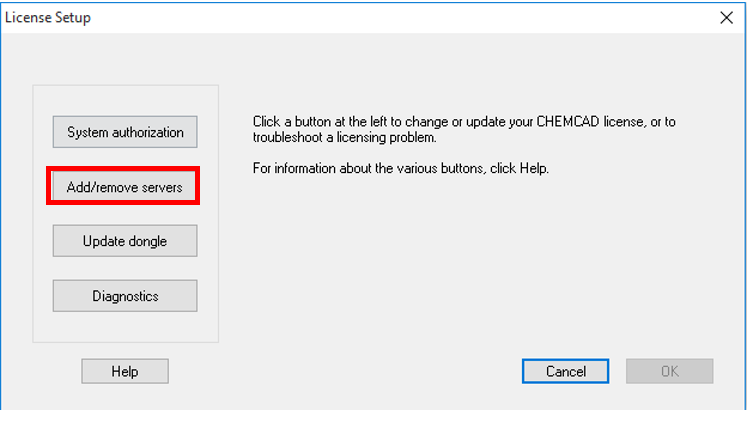
11. In the window that appears, click "add/remove servers".
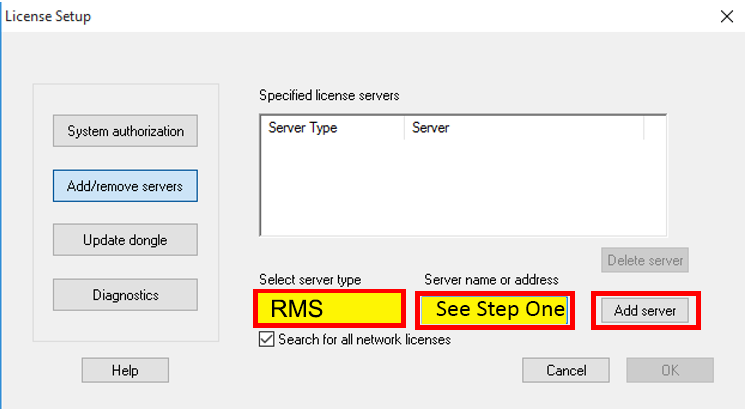
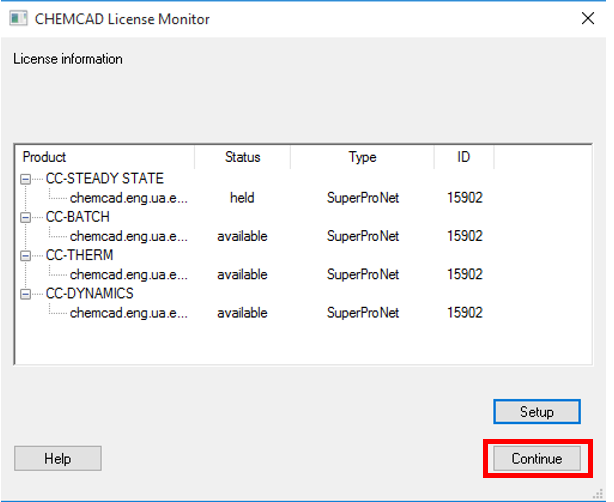
12. You should now be able to select the server type and enter a server address. Select "SuperProNet" from the server type drop-down. You can get the server name to enter into the server address box via this link to UA BOX Then click "add server", then "ok". After this, the window should confirm the license was picked up. Click "continue", and ChemCAD is now ready for use.
Video: How to update ChemCAD license server

